Making Wax for Carving, Casting, and Machining
Pouring, Hand-Forming, Detail-Carving, or Polishing – Wax Does it All
Sculpting and hand carving are skills that do not come naturally to me. I can visualize, create, and generally comprehend geometric forms, but there are some things that I just cannot see while working on shapes in nature, and this includes human faces and figures.
I do still need to be able to create an acceptable figure or head now and then for automaton or animatronic projects, but unless some skill develops it is destined to be a “rework until good enough” endeavor. I can live with that shortcoming as long as the job can still eventually get done. It does however require the selection and use of sculpting or carving materials that can tolerate a lot of mistakes and rework. The ideal material would be easily hand-moldable yet firm enough to hold shape and detail without fear of damage from the slightest mishandling. It must carve easily, but it should also allow easy addition of material to fill in mistakes.
After trying a few different types of sculpting media (water-based and polymer clays, oil based plasticine, basswood, carvable foam) I decided that carving wax was a material that I could live with. It is firm enough to hold detail, is easily bonded, and it carves like a dream. Some materials can be warmed in a water-filled electric skillet or cook pot to a temperature where they can be hand-molded much like clay. Most can also be melted to liquid and poured into a rough mold to cast a form that can be carved and polished to perfection with little need to add extra material. The fact that the entire range of states from pourable liquid to carvable solid occur well under the boiling temperature of water makes this a nearly ideal material to work with.
I tried a few different types of firmer carving materials including Castilene (hard) Modeling Compound (made by Chavant) and some of the wax variations sold by WillowProducts. Although Castilene is pretty widely used by some very good artists, I found that it was a little too translucent to my eye and it also had a rather unpleasant odor when heated to pouring temperature. It also tended to froth and bubble a little on the surface when poured into a mold, and the viscosity is somewhat higher than other materials. But to be fair I never really gave it much of a chance once I found a material more suited to my needs.
By contrast the WillowProducts waxes had excellent opacity, a wide range of firmness from hard (sometimes brittle when cold), to hand moldable when slightly warm, and finally to very fluid when warmer yet. And the odor was not only tolerable, it was downright fragrant – I still usually take a good snort of the air inside a hollow WillowProducts wax casting whenever I pick one up. It is like working with a mildly fragrant soap and is very pleasant to work with. When cast into sheets or in a mold the top surface rarely contains any bubbles as it hardens to a fine satin texture.
Unfortunately, after settling on two favorite WillowProducts materials known as Ice and 3Sixty (a.k.a. “360”) I tried to order some larger quantities and discovered that the waxes were no longer being manufactured by the owner Gary Overman. Fortunately Gary decided to document the recipes and procedures for all of his current products in a Wax Journal that was and is currently available in PDF format online for $15. At that time I had little desire to make my own wax, but for curiosity’s sake buying the recipe book for that price was an absolute no-brainer. The Wax Journal has recipes for Air, Ether, Max11, Fuse, Zen, 3Sixty, and Ice, ranging from very soft, hand-moldable to hard, carve-only.
After trying a couple of other products without much success, I decided that it was time to take the project on and cook some WillowProducts batches. The ingredients had to be purchased from several art/sculpture/pottery-supply sources and eBay, and in some cases a premium was paid for buying in smaller quantities. After testing the waters with some small quantities and experimenting a bit I ordered more ingredients to make about thirty pounds of 3Sixty and some smaller quantity of Ice. The pictures in this article will show the sequence of steps required to produce a four pound batch of 3Sixty. The wax will be filtered, cast into blocks, and then remelted in order to cast a head that had been previously sculpted out of clay.
Note: I will not be listing the recipe nor discussing the specific ingredients in any detail here for obvious reasons. Buy the Journal from Gary if you are interested, or find a free recipe.
Some free recipes for wax mixes can be found by searching around the net and some of the modeling and sculpting forums (see the Links/Resources Page). Gary Overman also offers some free recipes at Overman Charity Waxes. An updated PDF document with additional information can be downloaded here. If you look over these recipes you can get some idea of the ingredients that go into a mix and what effects those materials may have on the handling characteristics of the end product.
It was fortunate that I had purchased some of the different WillowProducts waxes before production ceased, and those samples are still preserved as standards as an aid to understanding how the various ingredients in the recipes can affect the workability at different temperatures. I don’t know if Gary still makes or offers any evaluation samples of the various waxes, but it would seem to be a good idea to have those available as a supplement to the Wax Journal for those that never had a chance to try the products when they were still in production.
This article is not intended to be a tutorial – I am new to the sculpting/carving/wax-making scene, and the little bit that I have learned about the process is a miniscule subset of what Gary carries in his head. It is simply of a picture tour of the key steps involved with some personal commentary thrown in. I can claim that I have made several successful batches of the two mentioned products and I still enjoy the process and the cost savings when large quantities are needed.
Equipment Used
Heating & Melting
One of the recommended ways of heating the wax mix is to use an electric Presto Brand Kitchen Kettle. These are available for around $30 and will make a batch of a little more than seven pounds in one melt. I originally bought one specifically to use for making wax, but then I discovered that it also works for tempering chocolate and it is now dedicated to the manufacturing of homemade chocolate-covered frozen bananas.
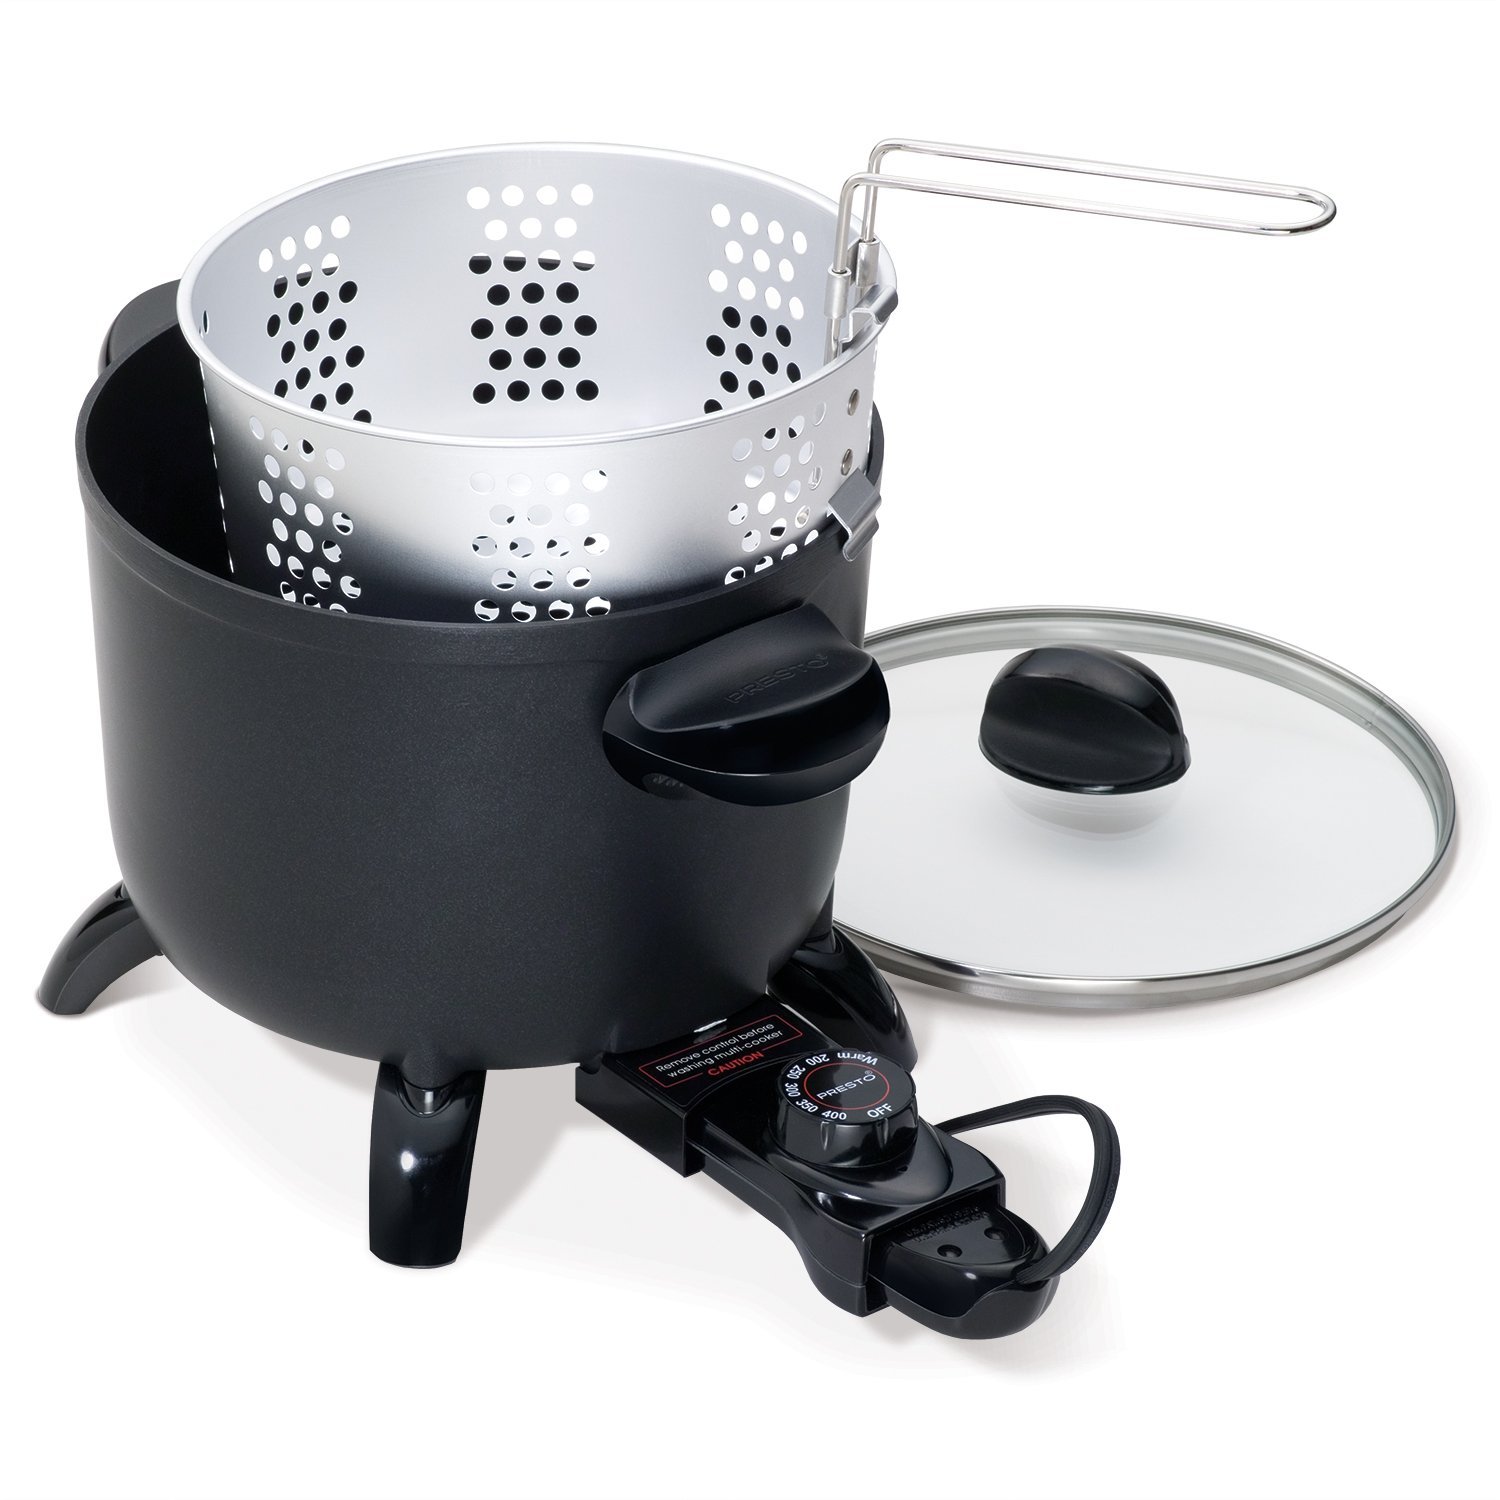
Presto Kitchen Kettle – Good Temperature Control and a Seven Pound Capacity
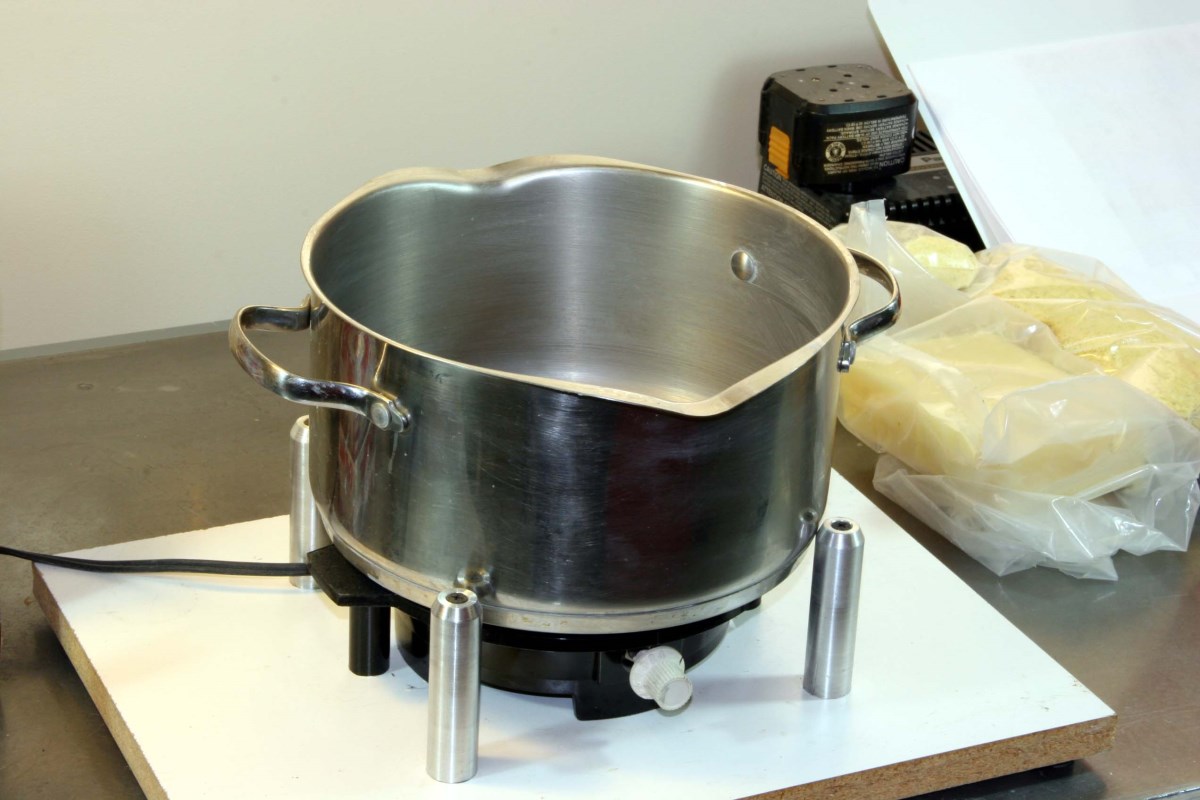
My Stainless Melting Pot – A Presto Pot Would Be Better
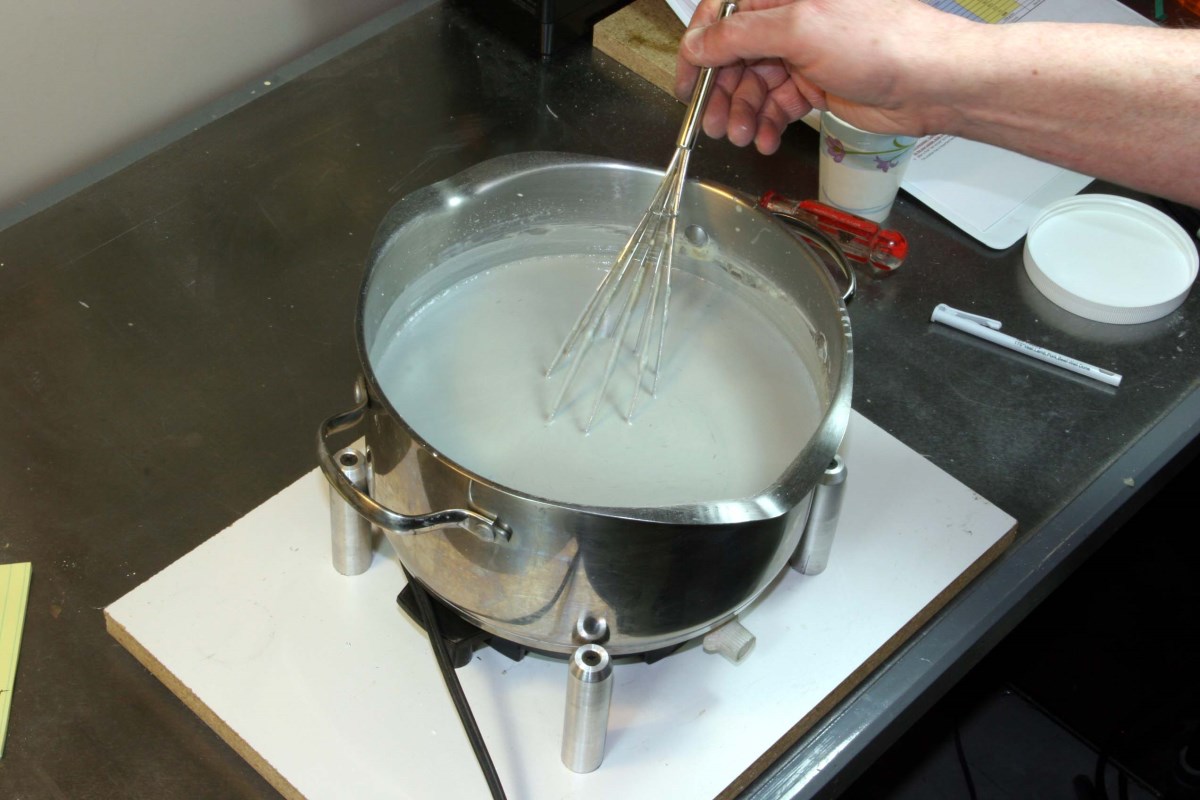
Instead of the Presto Kitchen Kettle I use a large stainless steel kettle with a glass lid fixtured to rest securely on a hotplate. Most of the melting is performed at a low temperature (pouring temperature is 170 degrees F) and this is not a very stable range for the hot plate’s thermostat. This situation is improved by plugging the hotplate into a variable router speed control, which is basically like a lamp dimmer except that it can handle the higher wattage of the hot plate.
By experimentation I found a dial setting for the speed control that gives a good working temperature with less chance of runaway should the hotplate’s thermostat stick. The hotplate’s thermostat dial still sets and regulates the temperature, however running at a reduced average voltage forces the thermostat on-time/off-time ratio to be higher with less “hunting” and overshoot around the desired target temperature.
The stainless steel pot is easy to clean but is a poor conductor of heat. In the process of stirring the mixture a ring of wax will solidify at the edge of the surface where the metal is colder, and I have to use a heat gun on the outside to clean it off. I suspect that the Presto Pot may not have this problem because the pot is made of thicker-walled aluminum and should distribute the heat better up the sides.
Actually after trying to rationalize why I didn’t use the Presto Pot, I’m just going to go buy another one – specifically for wax this time…
Mixing
An old blender is effective for mixing and pulverizing some of the more problematic granular dry materials, although it becomes less useful for small batches where most of the material sticks in the base near the blades. A large mortar and pestle is adequate for hand grinding small batches.
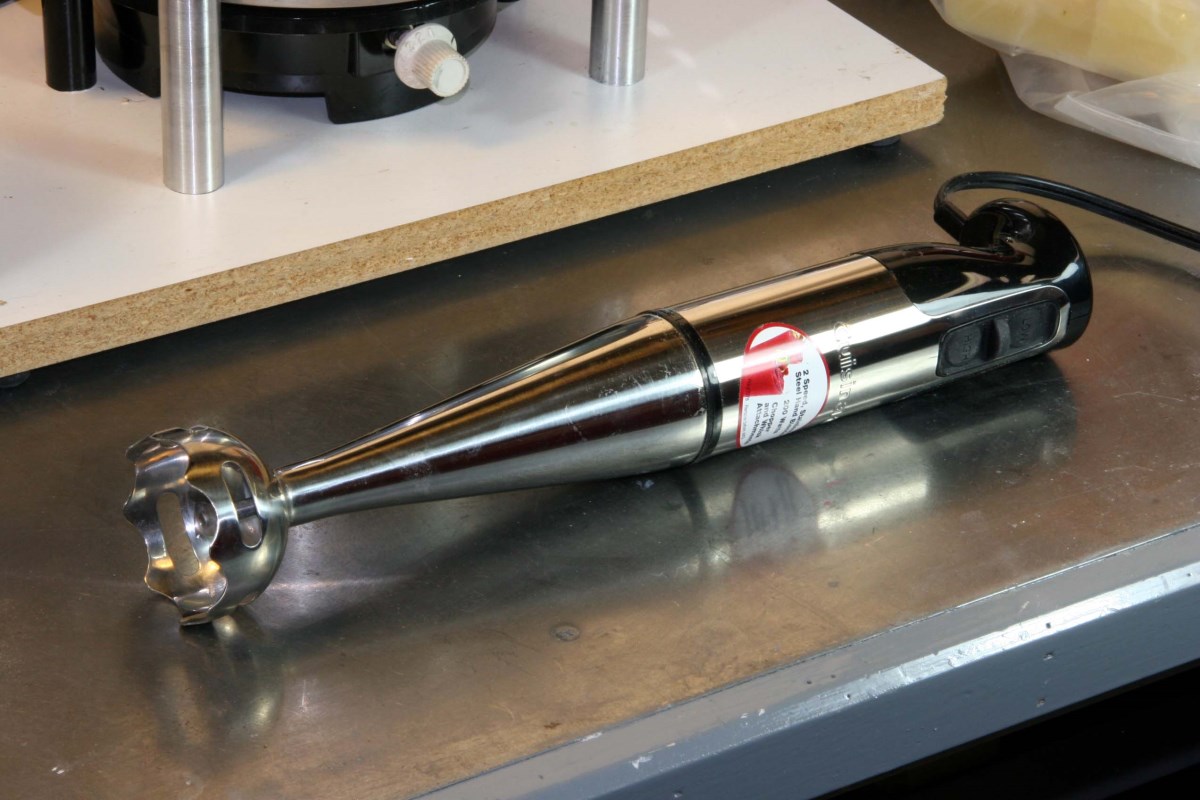
For mixing dry materials with the melted waxes Gary recommends using a conventional mixer rather than a handheld blender. I tried that, but in the end I started using a decent quality hand blender – it runs at a much higher speed and doesn’t splash. It must be operated intermittently to avoid overheating, but its greater effectiveness more than makes up for that.
Finally, a few wire whisks from the dollar store are handy to have around for quick stirring.
$20 On Sale From Costco; Works Better Than a Conventional Mixer For Me
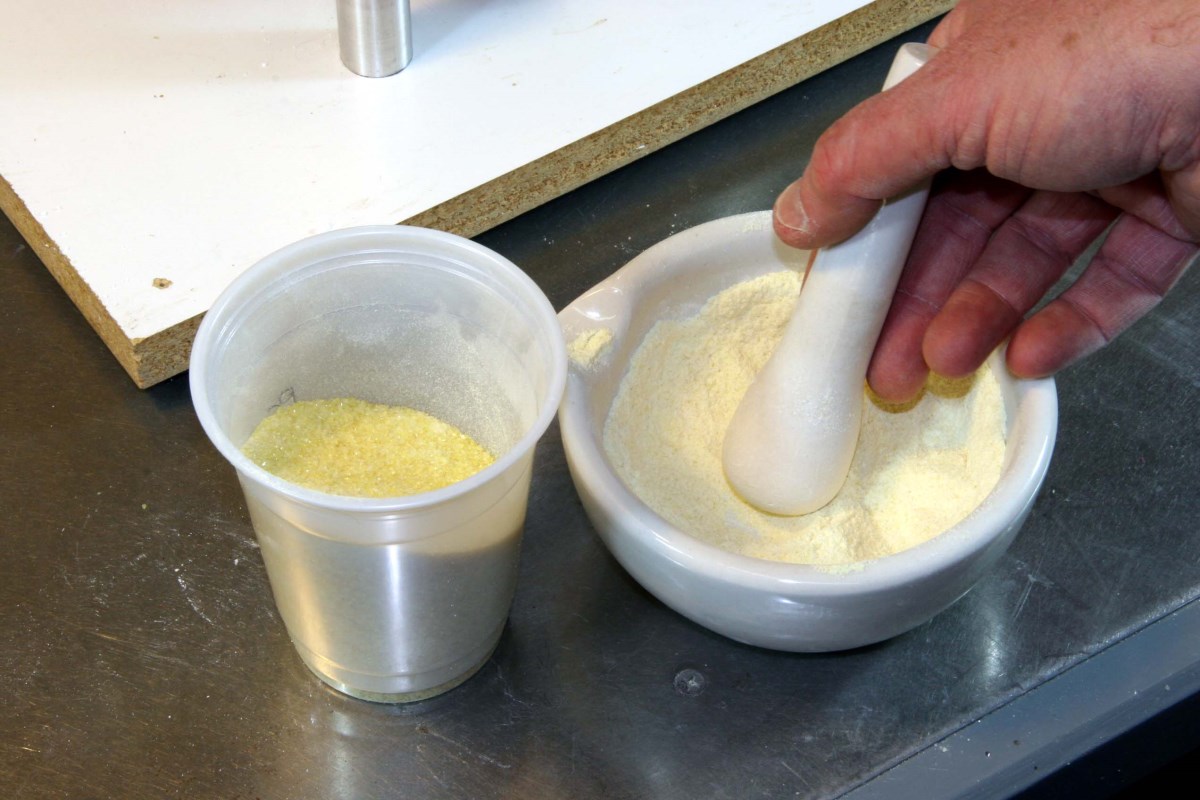
Granular ingredients That Tend to Clump are Ground With a Separator Powder
Miscellaneous
A beam balance or an accurate electronic scale is needed to measure out the various components. Colorants may be measured in grams, while waxes and fillers may be measured in kilograms, so both a scale with both capacity and accuracy is important. Weighing out the various ingredients can be tedious, particularly if using a mechanical balance where quantities exceed the range and you have to use multiple containers. A large capacity (but accurate) electronic scale would be handy.
Dollar store muffin tins are handy for casting test samples or entire small batches. Gary advises that the wax mix be poured at a low temperature and hardened in sufficiently thin layers so that the ingredients in the mix do not have time to separate before solidification. For larger batches I use several large high-wall cookie sheets and limit the pour thickness to 3/8″ or so. If separation does occur it is usually top-to-bottom; each subdivided block of finished wax will have the correct overall ingredient proportions even if it is not entirely homogeneous. You are usually just casting bars to remelt in the future anyway, and the settling in the final casting is what matters. Depending on the type of mix that you are making the wax might stick a little to the pan even at room temperature, but a few minutes in a freezer or refrigerator will cure that.
A $10 digital thermometer has a fast response and helps monitor the pouring temperature, which is particularly important for minimizing shrinkage defects when casting a large form.
Some means of filtering the poured mix must be used – no matter how hard I try I still end up with pigment chunks in the bottom of the pot. The Wax Journal talks about filtering or you can figure something out for yourself.
Making a Batch of WillowProducts 3Sixty Carving Wax
WARNING: Waxes and the fumes generated upon heating are highly flammable. If you choose to experiment on your own do not melt wax with gas burners, and work in a location where you can deal with a fire in the melting pot without freaking out and spilling flammable liquid on the floor. Keep the area open and free of excess materials, and have a tight-fitting lid and a fire extinguisher nearby. Paraffin fumes may be harmful to breathe, and a dust mask should be used when handling dry materials.

The pictures are largely self-explanatory and are slightly less boring than an hour-long wax melting video:

Beam Balance and Ingredients Lined Up to be Measured Out

All of the Ingredients for a Four Pound Batch of my Favorite Wax
Some of the Waxes Come in a Granular or Flake Form and Melt Easily
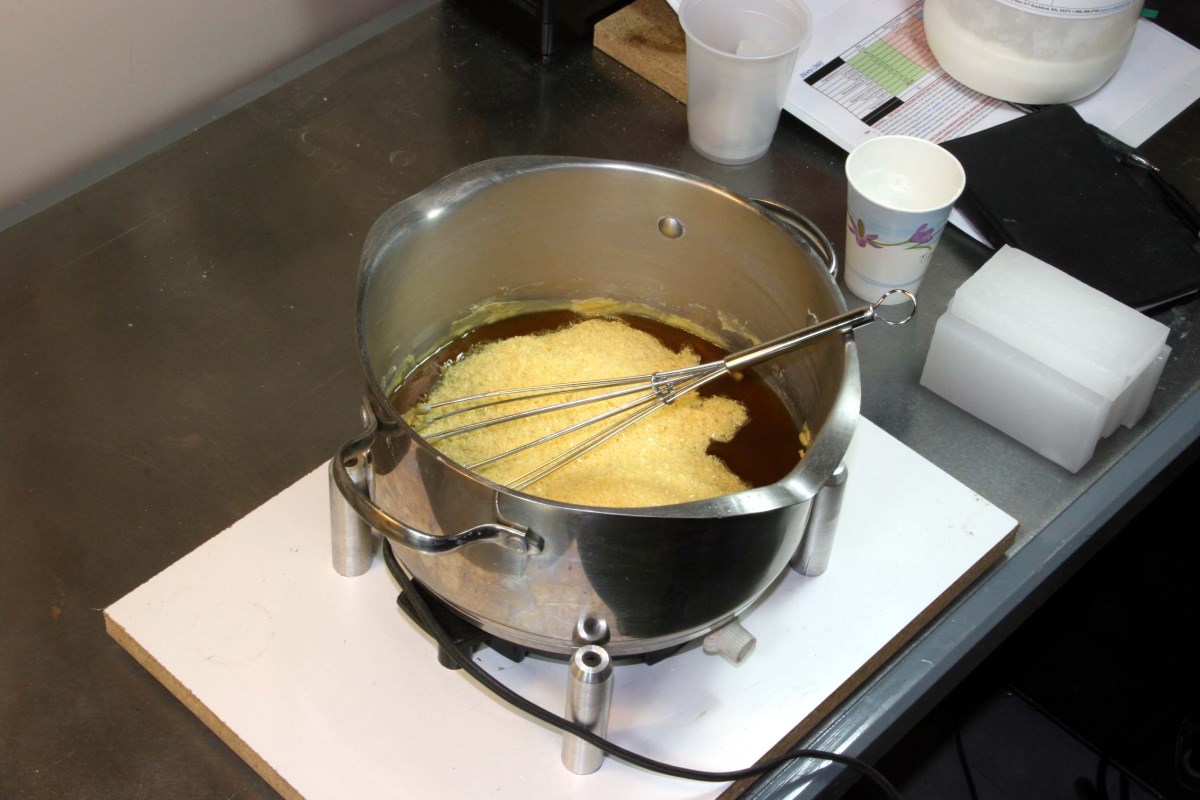
All of the Flake Waxes Are Melted Here
It Doesn’t Look As If All That Filler Will Fit In, But It Does
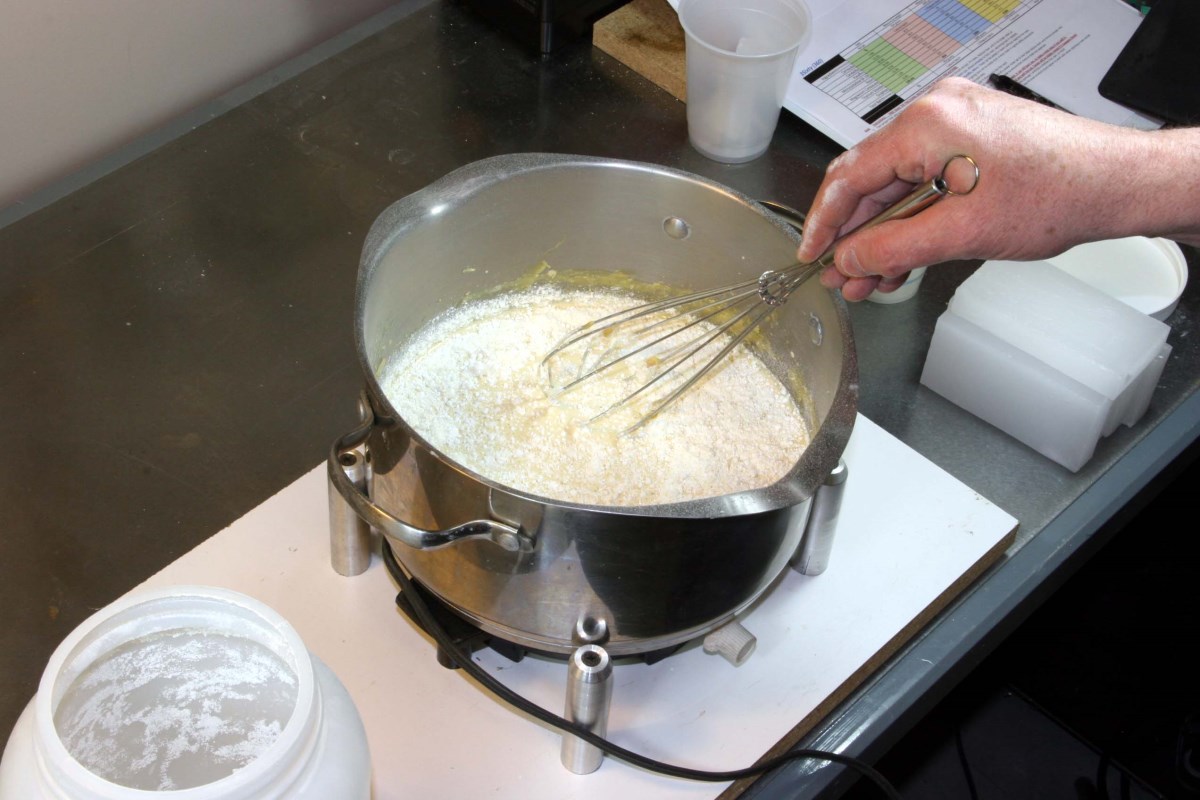
Fillers Reduce Cooling Shrinkage and Improve Carving Characteristics
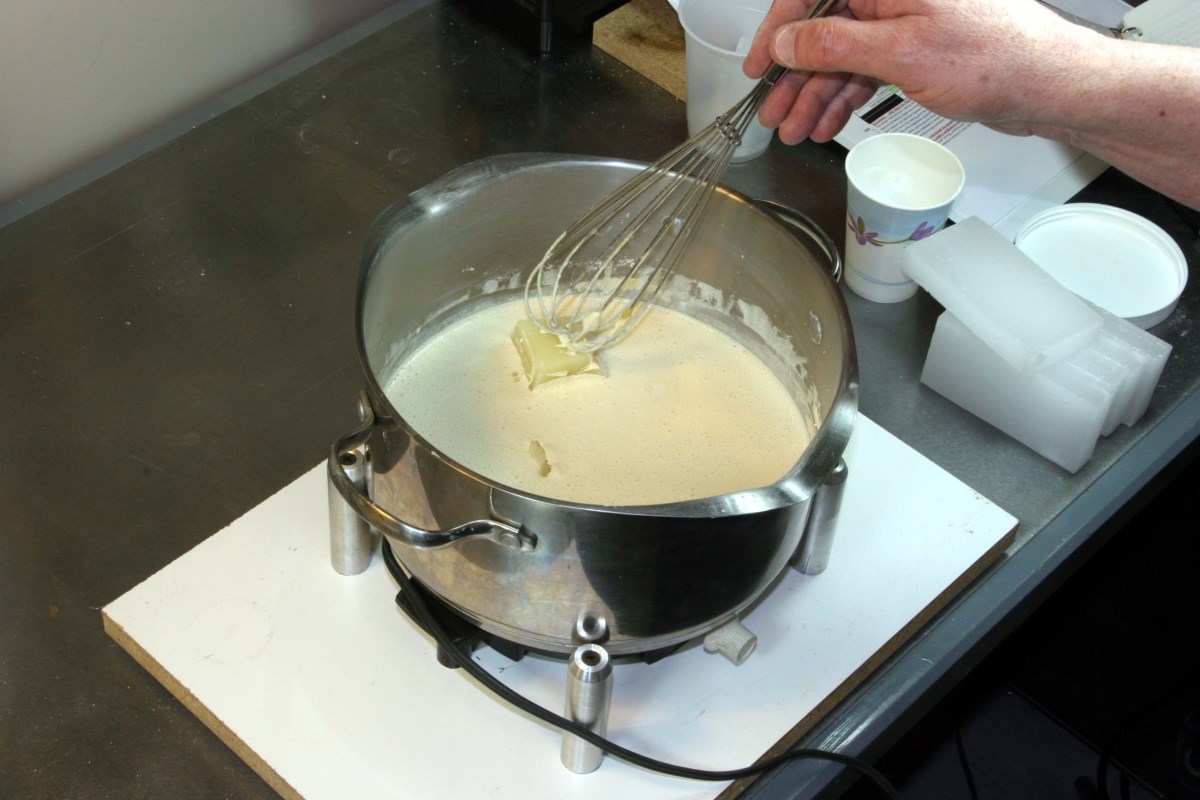
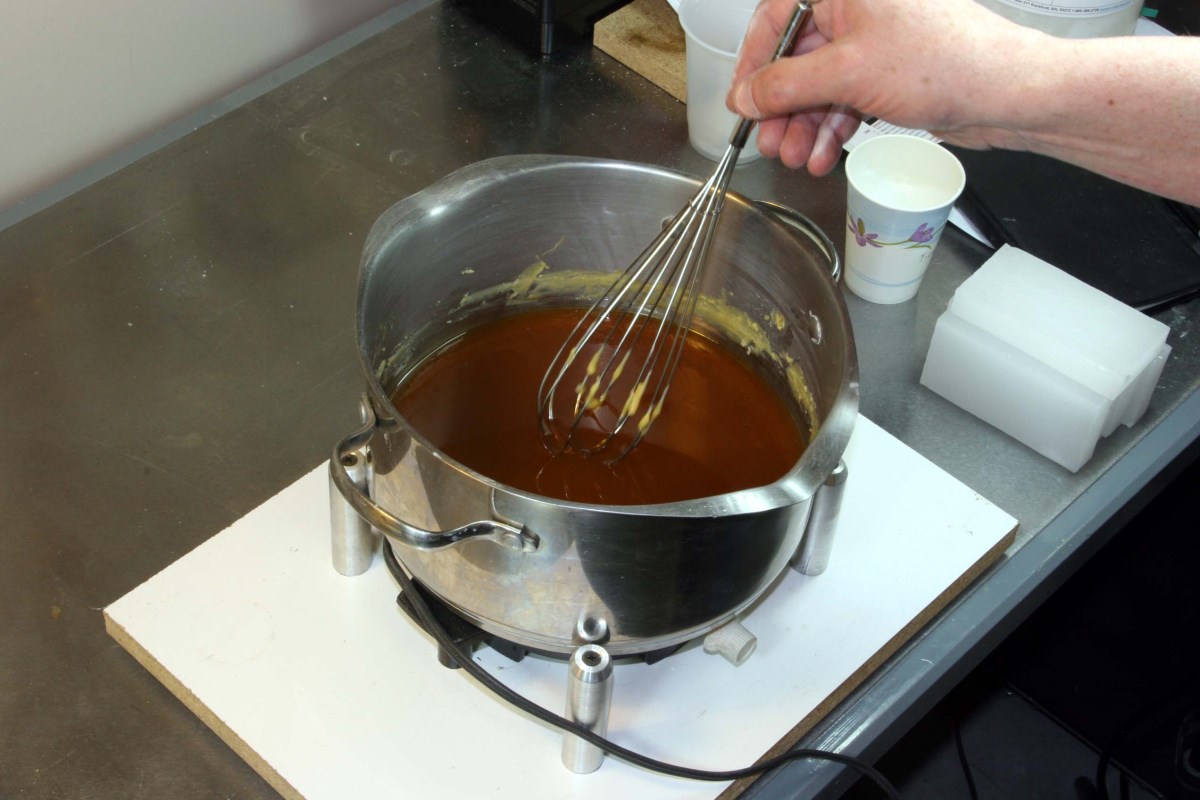
Melting in One of the Block Waxes
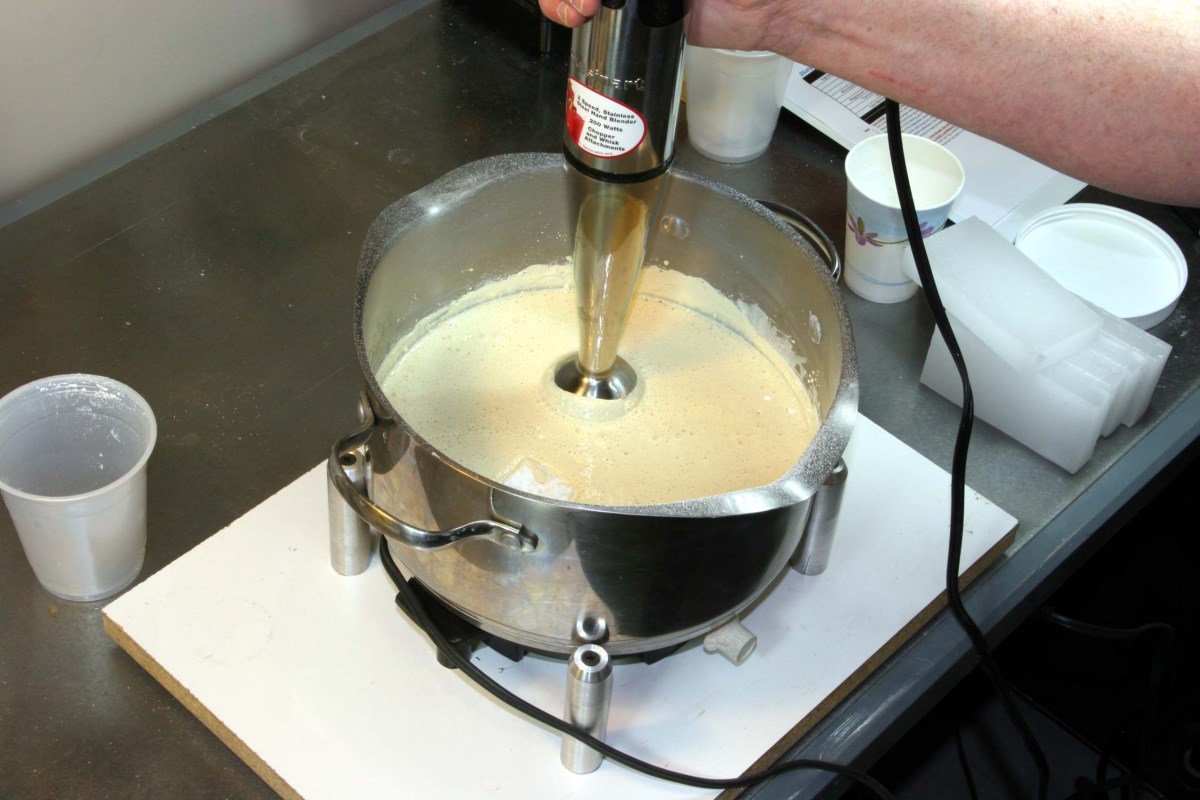
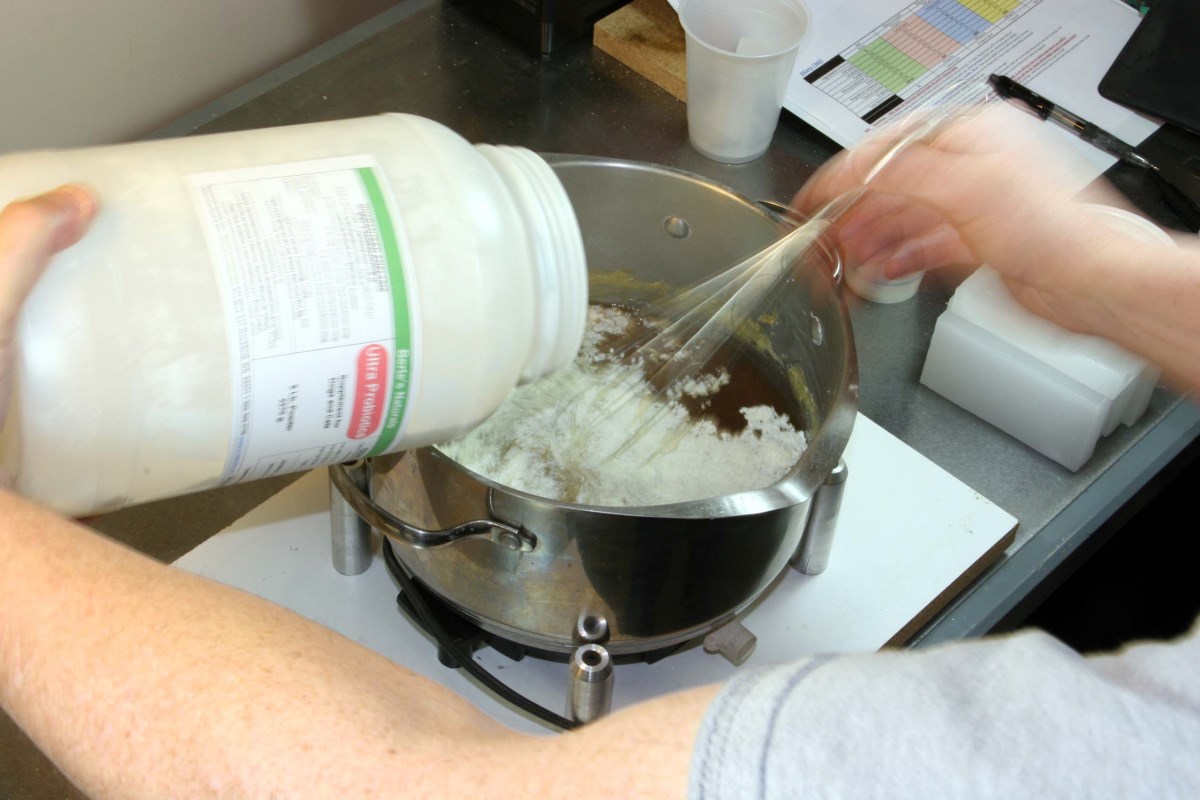
High Speed Blending Helps Avoid Clumps of Pigment and Other Constituents
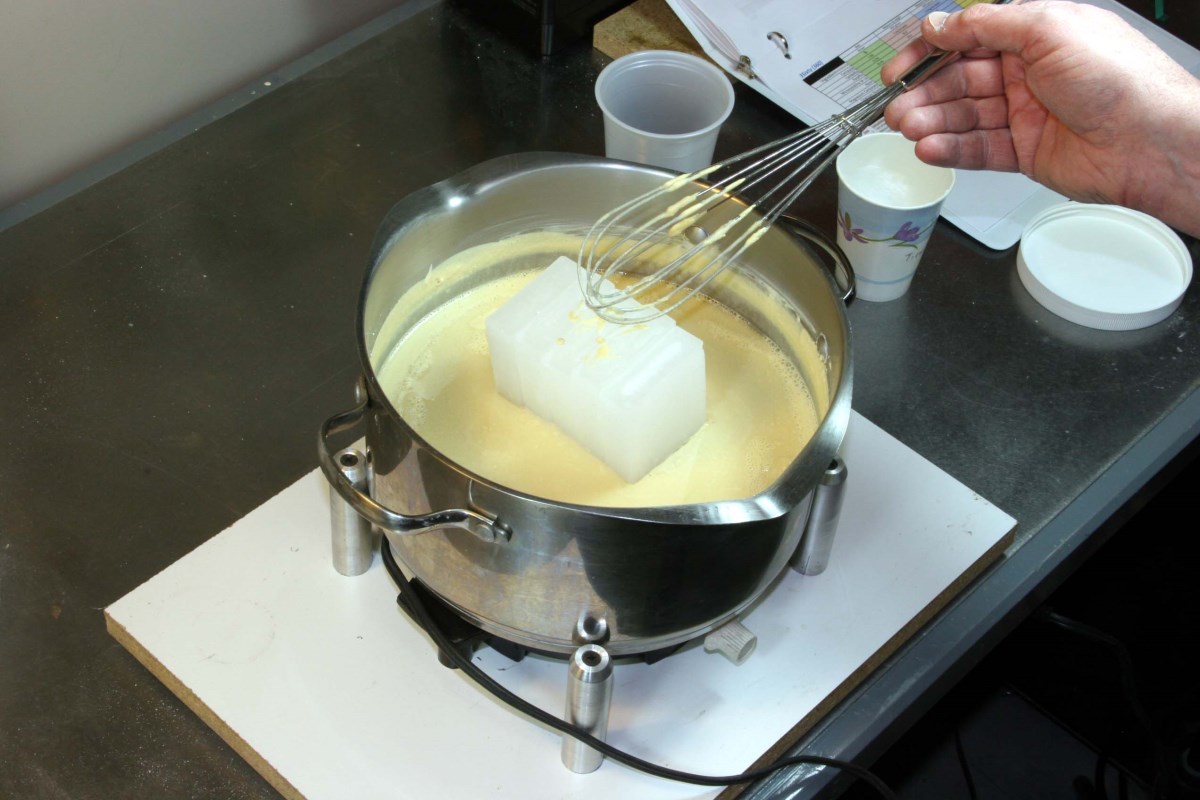
Melting in the Paraffin
Colorants Have Been Added – I prefer Light Gray over Flesh Tones

This Aquarium Filtration Material Came From a Pet Store
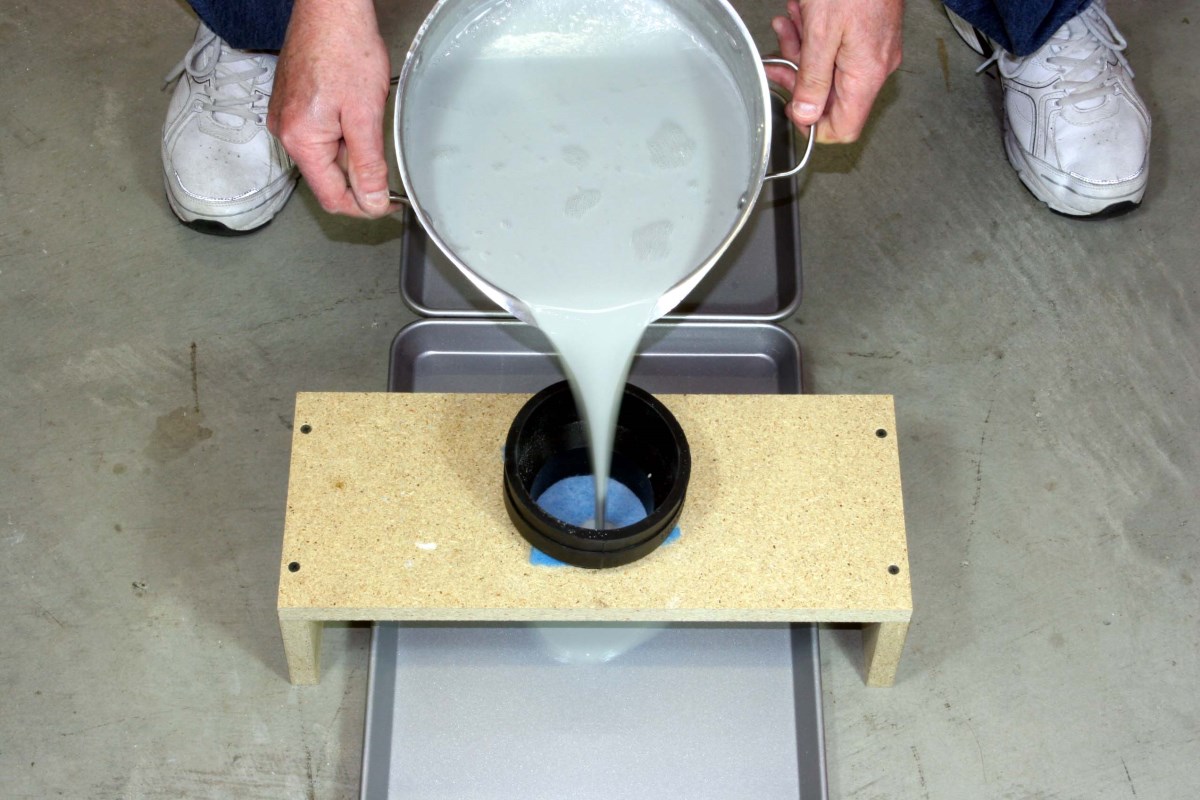
Pouring the Mix Through a Filter

Liquid Wax Cooling on Cookie Sheets
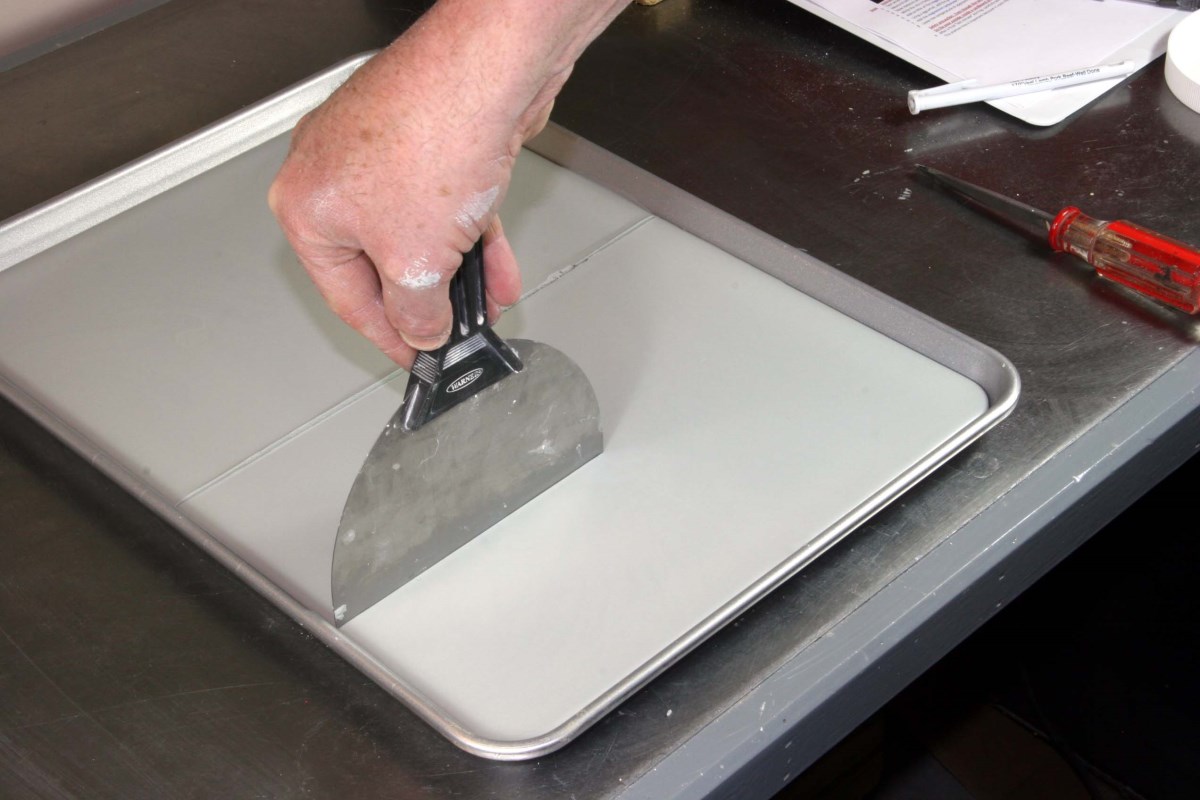
After Some Cooling a Spackle Knife Makes Clean Break Lines
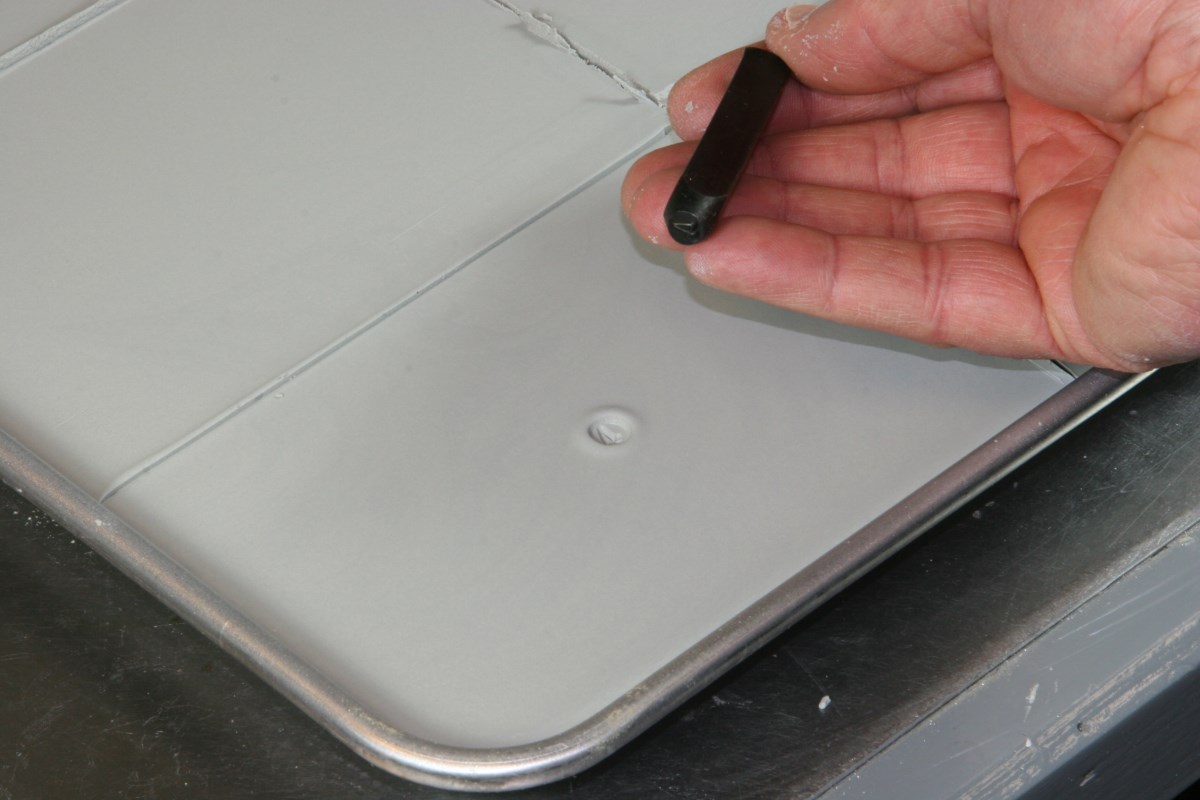
Metal Stamps Make Handy Batch Markers
Once the wax was solidified it was broken into squares and remelted to pour a rough intermediate head sculpture, which was the whole point of this effort:
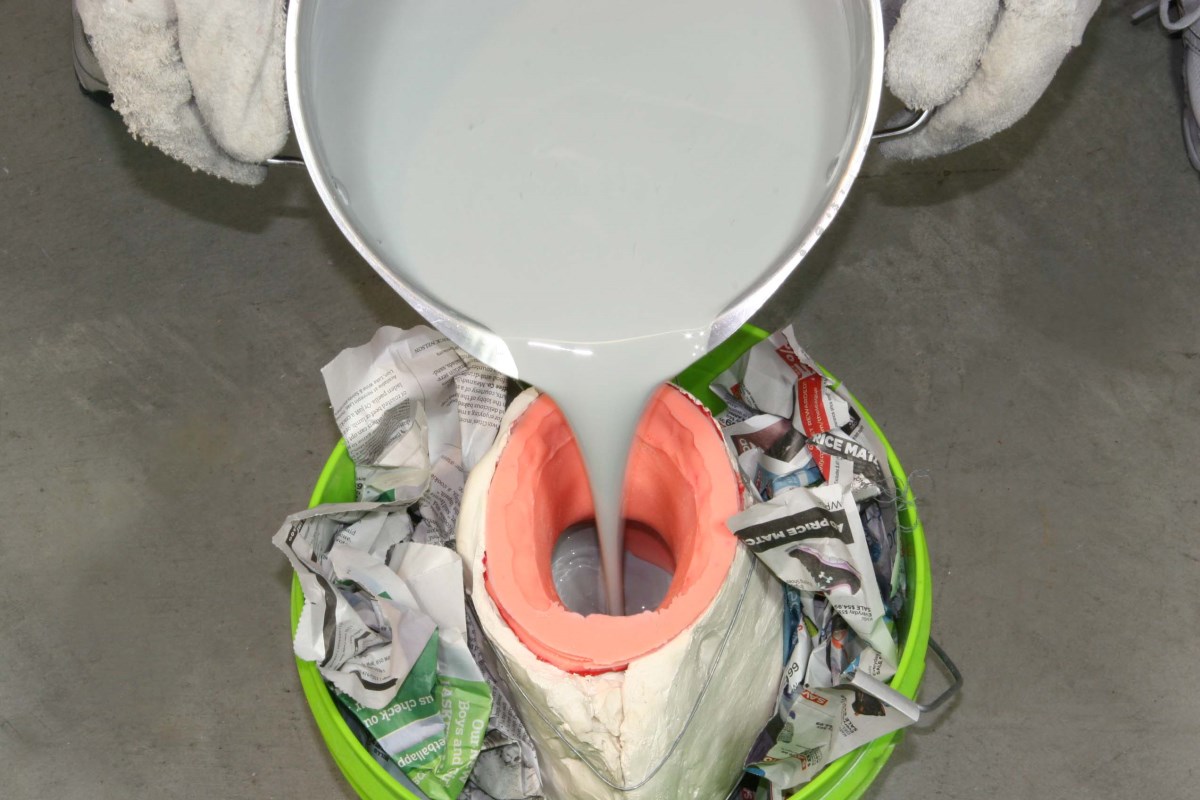
“I’ll Rip Your Head Off and Pour Wax Down Your Neck…”
Partially Filled Mold is Gyrated to Release Entrapped Bubbles – Mold Was Preheated
Nearly Four Pounds of Wax Were Used to Fill Small Head Mold – Excess Was Later Poured Out
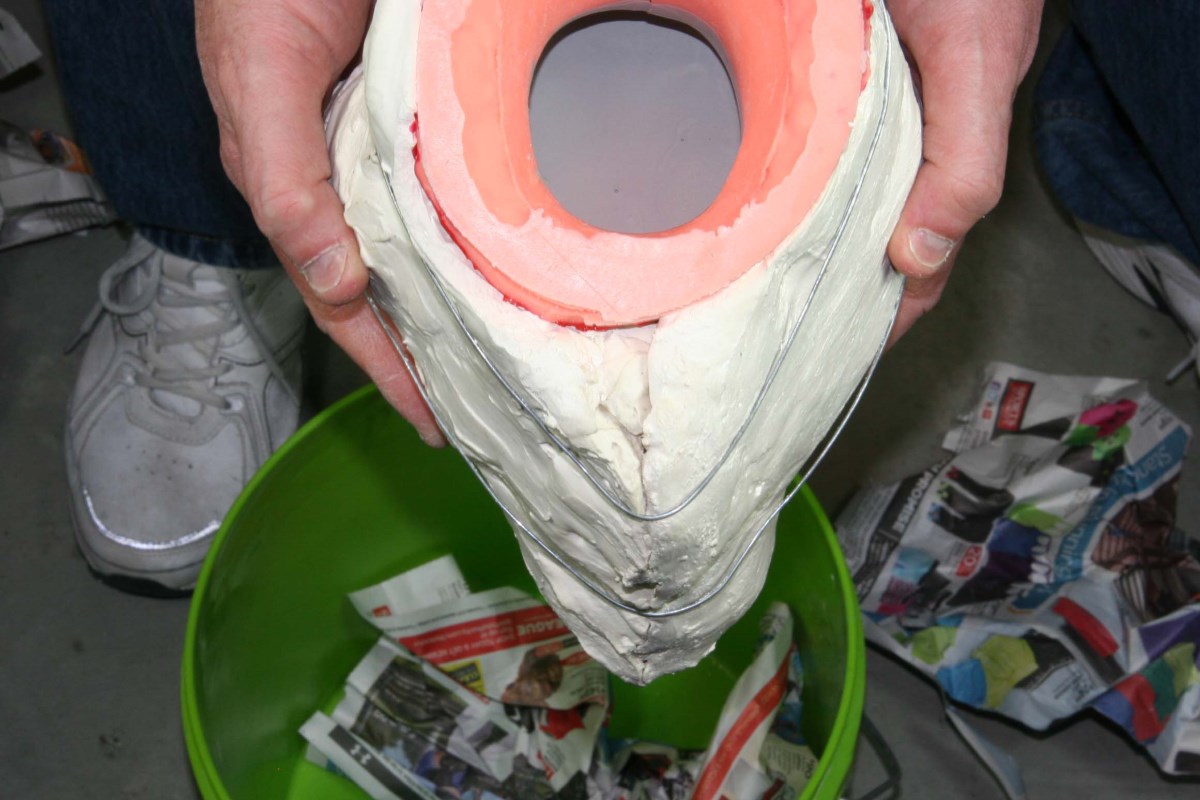
Not Since Twilight Zone’s Eye of the Beholder Have I Felt This Much Suspense
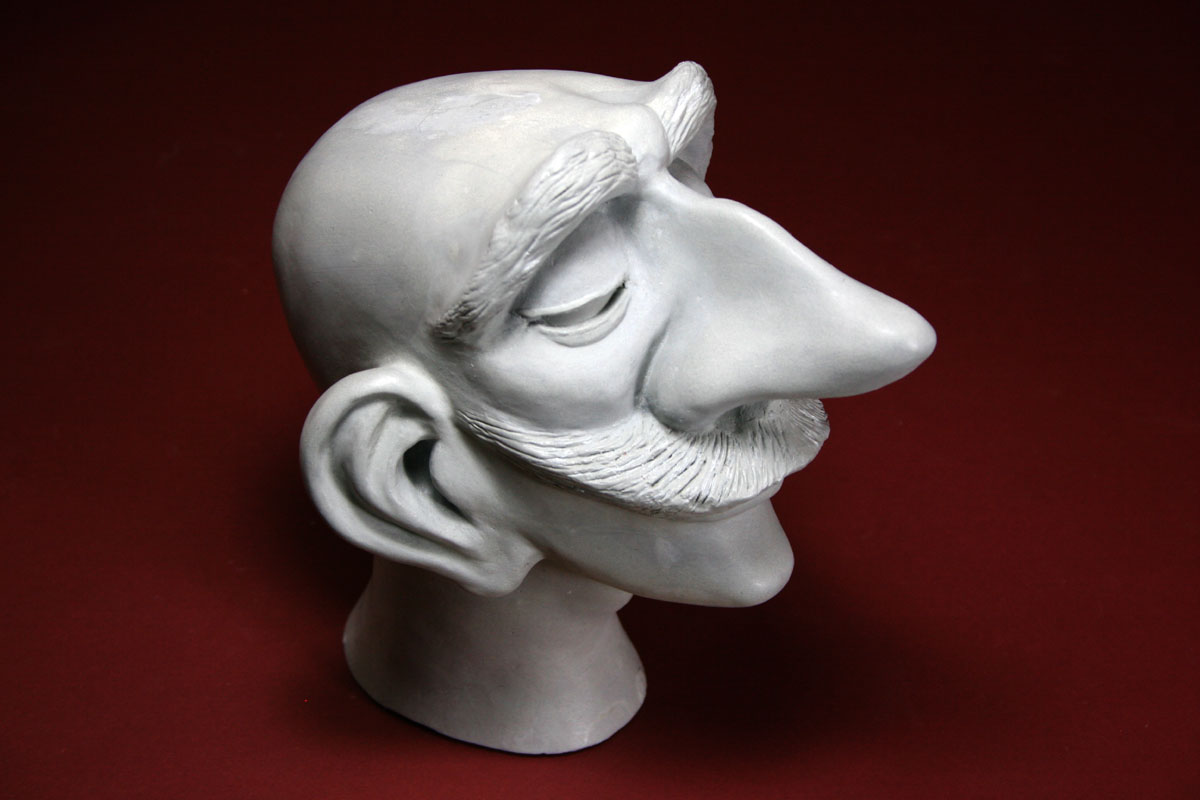
Now for the Fine Detailing
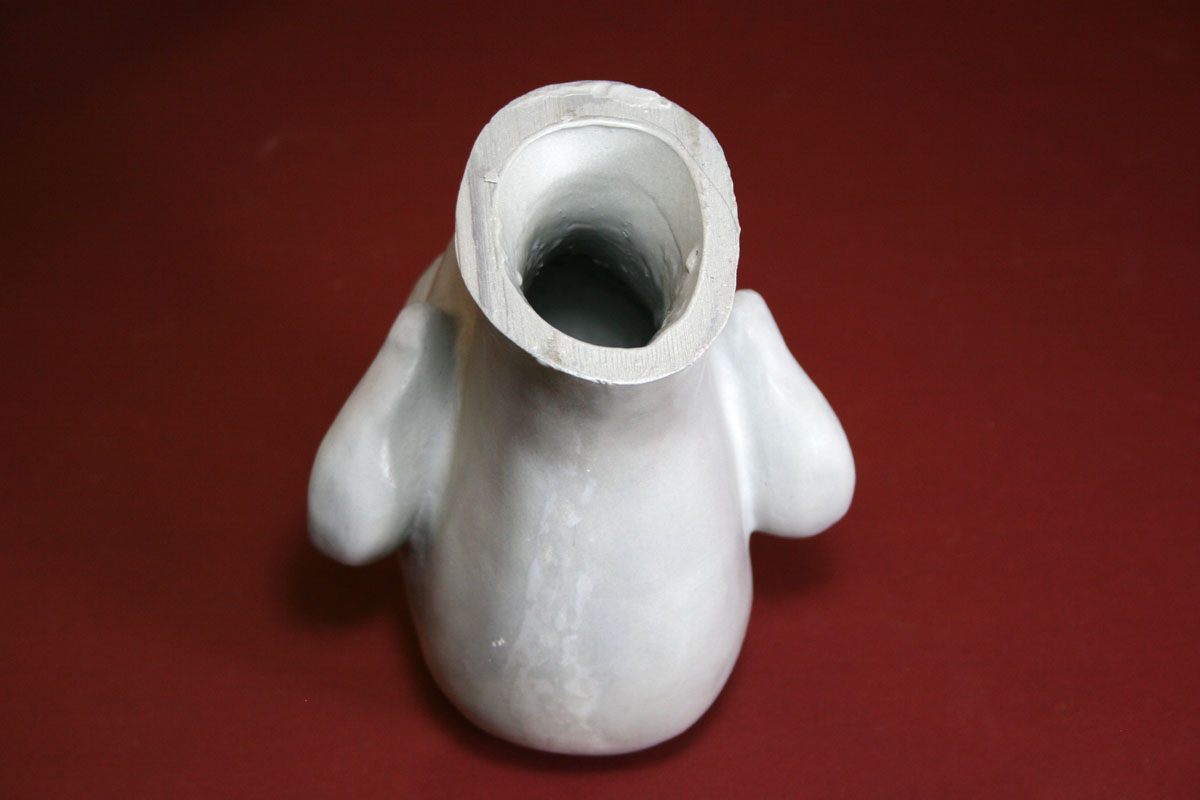
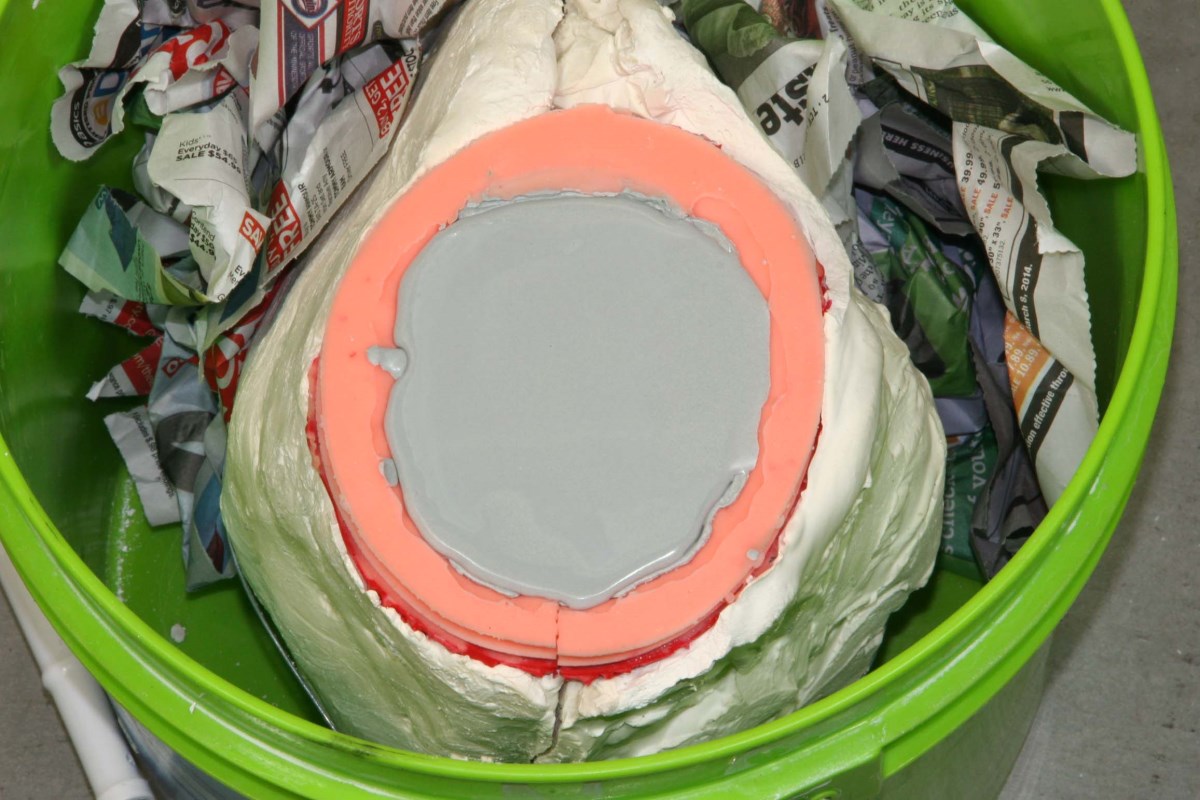
While Cooling in the Mold, the Liquid Core was Poured Out And Again Filtered, Leaving:

1.230 Kilos of 100% Pure 3Sixty. Respect the Chemistry…
Additional Observations and Tips
- The strong natural amber tints of the particular waxes used here almost always required using typically three times the recommended amounts of white and black colorants to get the cooler gray color shown in the photos and similar to my purchased samples. I have gone as high as 6x on the colorants with no ill effects. I do not like the end product to have a yellowish cast – it’s just a personal preference. I am not sure why the Wax Journal recipes call for so little colorant, unless my wax ingredients are different…
- Opacity of the solid wax is very important to me to be able to see details, which is another reason for using a higher ratio of colorants. This apparently isn’t a problem for many others.
- More pigmentation means more chance of it ending up undissolved in the bottom of the pot and ultimately filtered out during the pour. Gary recommends stirring and rubbing the bottom of the pot with a natural bristle brush to mash up particles; I also use a silicone spatula to squeegee the bottom as the mix gets stirred.
- I had nothing but trouble trying to get the white pigment mixed with paraffin, although it seems to dissolve more readily in the vegetable (flake) waxes. That is why I always add the white into the mix early, before the paraffin is melted.
- A very simple machinable wax can be made with 4 parts of paraffin mixed with 1 part of LDPE plastic (by weight). A piece of crayon can be used for colorant, and titanium dioxide will add to the opacity. A convenient source for LDPE is Zip-Loc bags cut into strips, but check the box first to confirm the type of plastic. Many recyclable shopping bags and other plastics are LDPE as well. The plastic melts slowly and requires a lot of stirring, and the fumes need to be vented. The resulting mix does not pour very well and tends to be bubbly, but the solidified material is amazing. It is firm and is very slick for carving and has almost a soapy feel. Carving is very controlled and chipping is minimal. Unfortunately adding material with a wax pencil is nearly impossible – it softens but does not bond well to itself. There is room for experimentation here.
- Different waxes can usually be joined to one another. For example a form created in one of the softer and more moldable waxes like Fuse, Zen, or 3Sixty can be detailed with a harder wax such as Ice. The Ice can be melted into the softer wax with a heated tool and subsequently carved to a finer level of detail than the underlying 3Sixty. This works well for fine textures and hair.
- Paraffin is at least one material that can usually be purchased locally to avoid shipping costs. It is available by the pound and is found in the canning section at supermarkets. Some waxes such as bulk paraffin, microcrystalline, and beeswax can be found at Dick Blick or Michael’s, but it is usually better and more economical to purchase the products from sources that will offer some choices and that also publish the material specifications.
- Extremely fine graphite for coloration can be purchased from some auto supply stores. I found mine online at AutoZone for next day delivery to the store. It was cheaper than any small-quantity online art-supply prices unless you need it by the pound.
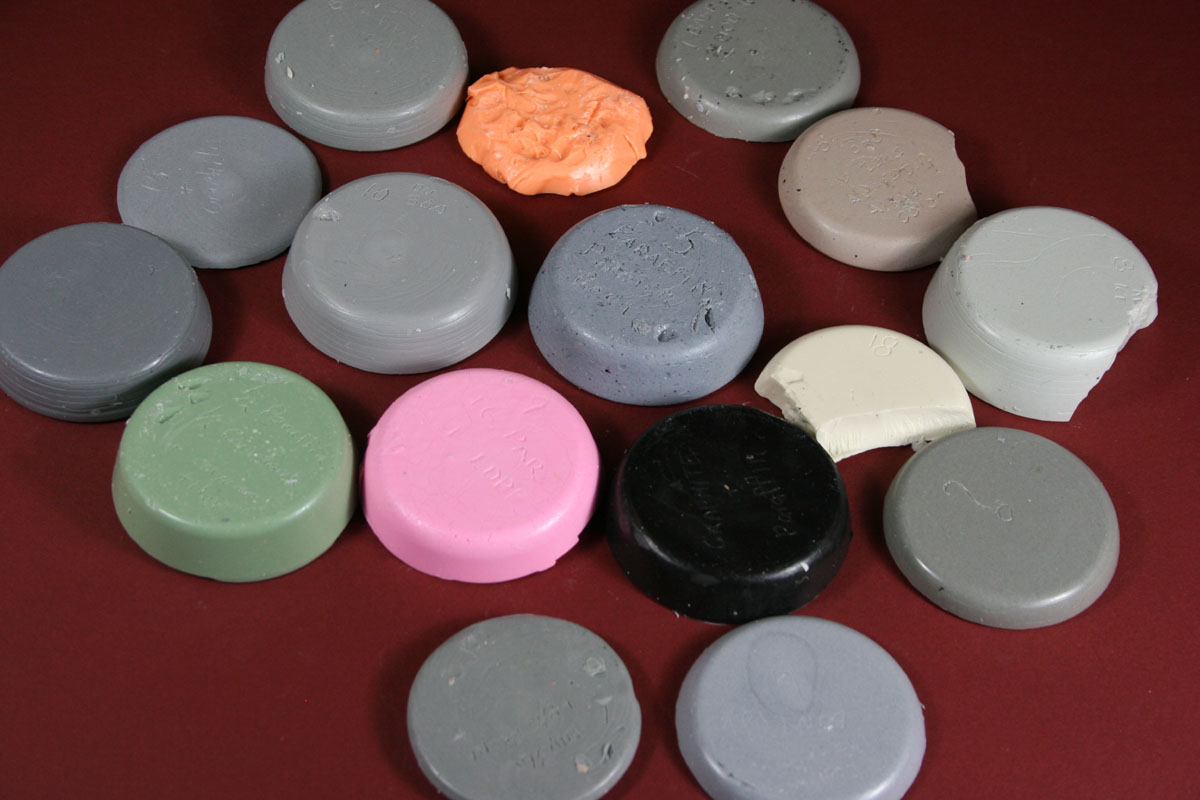
- A great deal can be learned by making small muffin-sized samples for experimental mixes. Concentrate on weighing out accurate proportions of the major ingredients – less important additives that provide coloration or opacity can be judged by eye since these material proportions are difficult to maintain in such small samples. Keep a record of the ingredients and mark or color-code the samples for future reference.

A Sample of Some Small Experimental Mixes Cast in Muffin Tins
Material/Information Sources
There are many sources for the materials commonly used in various wax mixes, although some will only sell wax in very bulk quantities. Sources that I have used for more reasonable quantities are listed below:
- The Wax Journal by Gary Overman – highly recommended
- Microcrystalline wax, carnauba wax, beeswax, paraffin – The Compleat Sculptor
- Titanium Dioxide, Magnesium Carbonate, Colorants – Laguna Clay
- Candelilla Wax – Old Time Soap Company (website or eBay)
- Paraffin, Talc, Mineral Oil- Supermarkets (Cub Foods) or Drug Stores
- Pine Rosin – eBay or sporting goods stores
- Graphite – Auto Supply Stores (Autozone), commonly used for lock lubricant
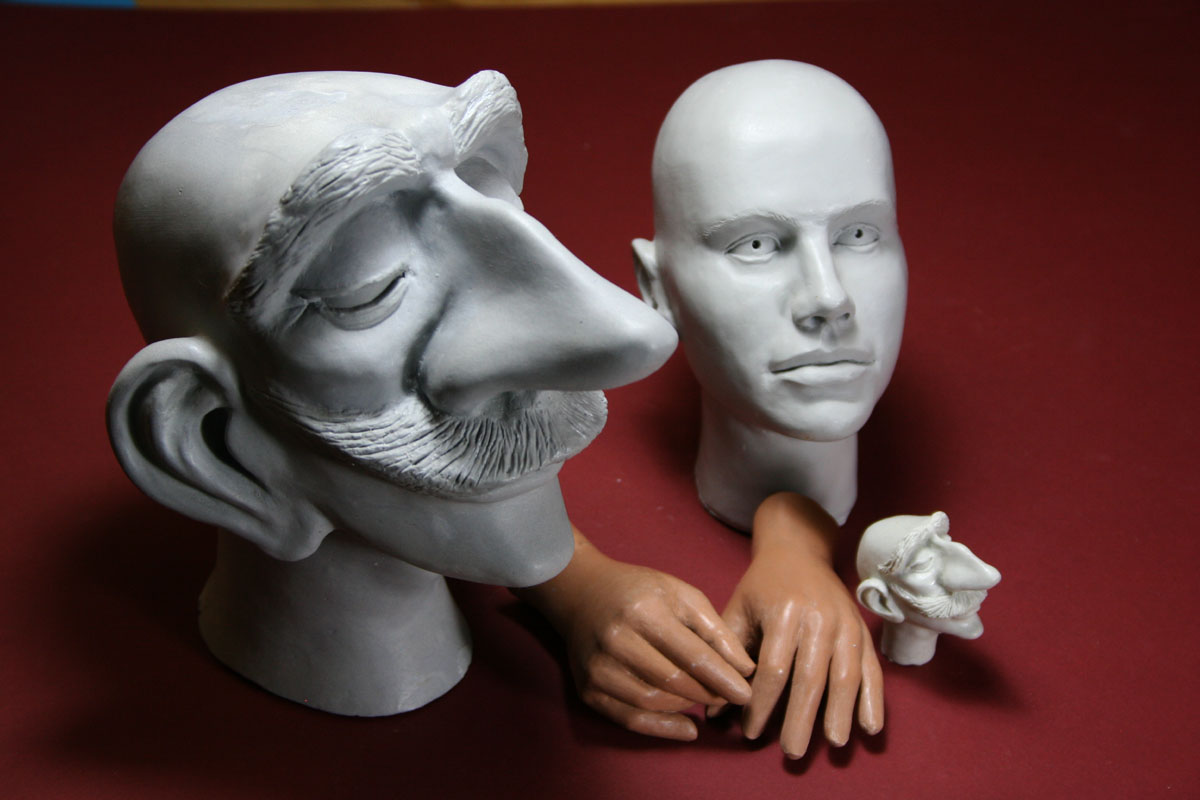
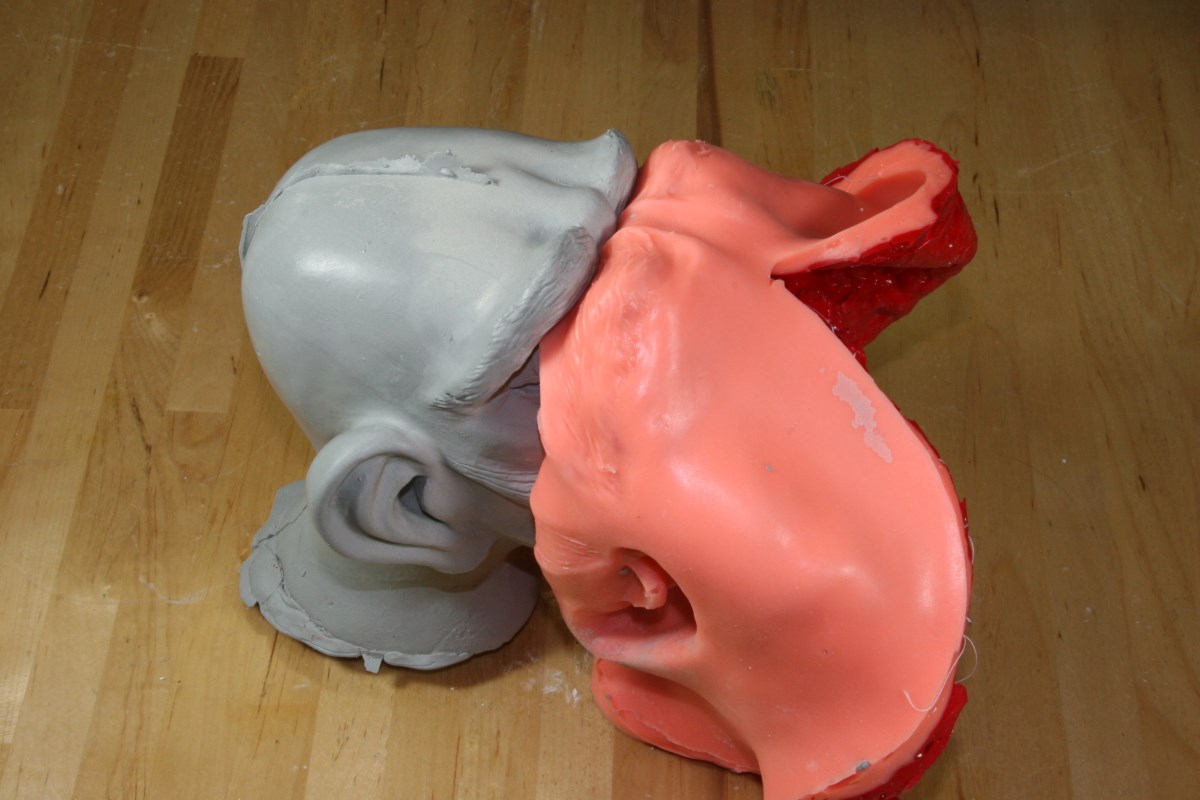
Rough Wax Casts in Progress: the Smallest Head is Carved From Homemade WillowProducts Ice and the Hands Are Made From Purchased WillowProducts Zen Wax
![]()